

Check Disk (CHKDSK) is a built-in Windows utility that checks your hard drive for corrupted files, patches faults and errors, and cleans up disk space to keep your PC running smoothly. When your PC is sluggish due to a nearly full or failing hard disk, use this utility.
CHKDSK commands :
- chkdsk – Scan the hard disk for bugs or defects with no repair efforts.
- chkdsk [drive letter]: Specify the internal or external drive to scan by replacing “[drive letter]”. For example, “chkdsk C:”.
- chkdsk /f – While scanning the hard disk, attempts to remedy defects or problems.
- chkdsk /r – Attempts to repair hard drive sectors so that they can be read by the file system.
- chkdsk /x – Disconnects a drive in order to scan and repair it.
- chkdsk /f /r /x – Scans the file system and its sectors for problems and repairs them. This also disconnects the drive if necessary.
To launch the Check Disk utility, choose your chosen method:
Run CHKDSK from the File Explorer
- Open “File Explorer” and choose “This PC”.
- Right-click on the drive you will scan and click “Properties”.
Note: Drive C: or D: usually contains the Windows operating system files.
- Go to “Tools”.
- Click “Check”.
- Check the prompt. If it says “You don’t need to scan this drive”, this means no errors are found. To scan the drive anyway, click “Scan drive”.
- Click “Show Details” to view the errors that were fixed during the scan. Otherwise, click “Close” to exit the window.
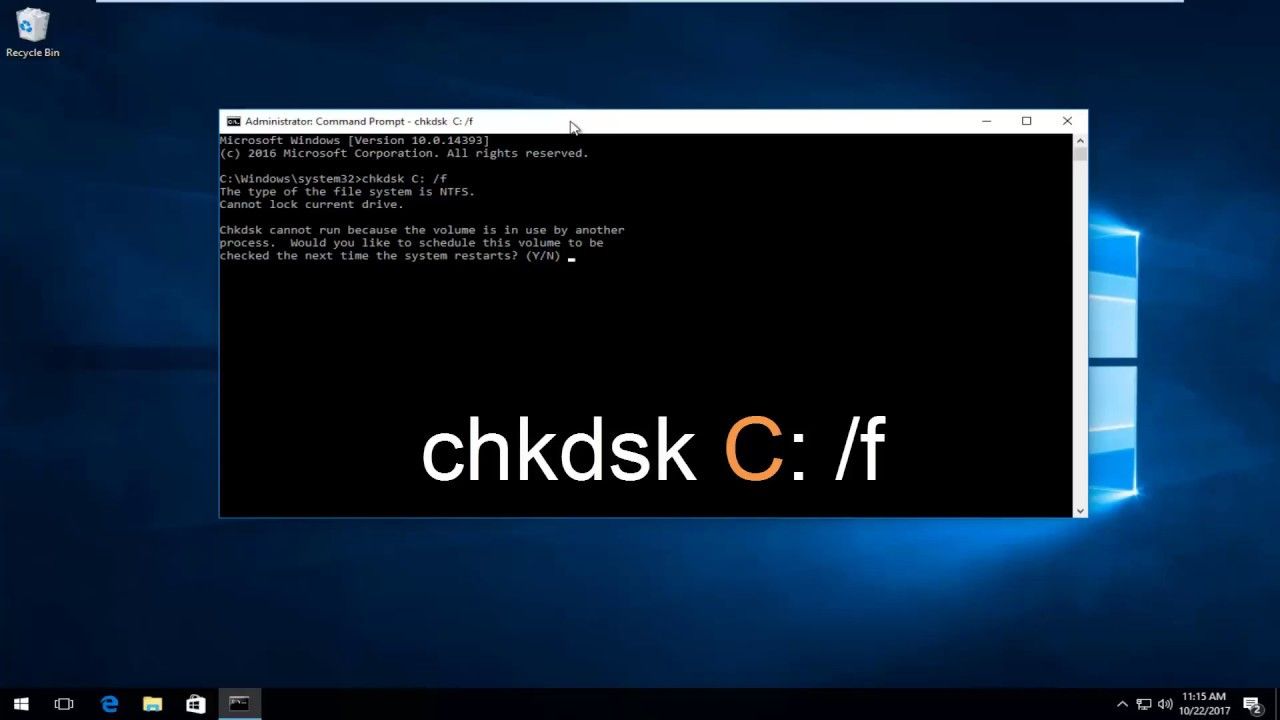
Run CHKDSK from the command prompt
- Click on “Start” > type “cmd” > “Run as administrator”.
- Type a CHKDSK command in the command prompt and press “Enter”. Include parameters like “/f”, “/r”, and “/x” to scan and repair any errors.
Note: If you opt to only scan your PC for drive errors, type “chkdsk” and press “Enter”.
Run CHKDSK from an installation media
If your PC displays the Blue Screen of Death (BSOD) error or does not boot up, run the CHKDSK utility from a removable storage device or an existing Windows installation media.
- Connect the installation media to your PC.
- Restart your PC.
- Press the “F8” key numerous times until the Windows logo appears.
- Click “Troubleshoot” > “Advanced Options”.
- Choose “Command Prompt”.
- Enter the drive you will scan.Note: Drive C: or D: usually contains the Windows operating system files. To test, type “C:” and press “Enter”. Then, type “dir” and press “Enter”. If the directory shows Windows items, this means it is your home drive. Repeat this for all drives until Windows items are shown.
- Type a CHKDSK command in the command prompt and press “Enter”. Include parameters like “/f”, “/r”, and “/x” to scan and repair any errors.
Note: Type “Y” and press “Enter” if a prompt asks you to run the CHKDSK utility the next time your PC restarts.


+ There are no comments
Add yours